Setting up and using Carte Blanche and the JAT Design
Step by step on how to have Carte Blanche running out of the box as an SVGA and Hard Disk style controller
Carte Blanche is a fully programmable hardware, firmware and software based peripheral board. On power-up, the hardware description is loaded into Carte Blanche's FPGA and the hardware design is built inside the FPGA chip. Executing firmware is also loaded into the newly constructed ROM chips inside the FPGA. This design source code is stored in an external SPI Flash device that is attached to the FPGA and is loaded every time the FPGA powers up. Carte Blanche is shipped with a design called JATv01. JAT (short for "Jack of All Trades") is a menu driven disk selection library that allows you to select a .NIB image from a FAT formatted SD card and run them as though you placed the floppy disks in the Apple's drive. JAT also has a Flash upgrade utility that automatically writes .BIT file extension files into the FPGA's Flash chip. Great caution should be taken when upgrading the Flash of a Carte Blanche Card. It is highly recommended not to upgrade your Carte Blanche until you have taken the time to develop a feel for how the FPGA concept works, as loading the wrong file into Flash will replace the shipped JAT design with whatever file is chosen. A backup copy of JAT is supplied with Carte Blanche on the "BITSREAMS" SD card, and can be reloaded using a JTAG cable via Xilinx ISE, AD or other JTAG programming application.
From the items you received with your Carte Blanche board, locate the following parts:
- Carte Blanche
- The SVGA adaptor board, hardware kit and cable
- The 'Democard' SD card
Setup:
1. Connect the ribbon cable to the SVGA adaptor board.
2. Using the hex nut and bolt, install the adaptor board into the DB9 opening in the back of the IIe's back panel. This assembly can be tricky, but provides a compact reliable interface. Installing the lower hex bolt to the DB15 eyelet prior to placing the assembly into the IIe makes installation considerably easier.
3. Install the Democard SD card into the SD card connector at J5 on Carte Blanche.
4. Install Carte Blanche into Slot 4 of your Apple. Ensure the card is fully seated and level. Carte Blanche can reside in any slot, however slot 4 is considered the most suitable for the type of storage CB emulates.
5. Connect the cable from the SVGA connector to the video connector at J6/J7 on Carte Blanche, routing the cable in a similar way as in the illustration below.
6. Connect your LCD display to the SVGA connector and power on your Apple IIe. You should see the Carte Blanche menu. If not, press Control-OpenApple-Reset, then Control-Reset.
7. Confirm the "JAT Active at Boot Jumper" is installed at location J4 between pins one and two. Carte Blanche is shipped with this jumper installed. If the jumper is removed, JAT reverts to being just a SVGA Video controller only.
Carte Blanche and the JAT design implement a complete Z80 based computer built inside the FPGA where it serves disk images to the Apple when data is requested via the Apple slot. At power on, JAT is aware no Apple II disk image has been selected and enters into a mode where it displays setup information on the SVGA screen and listens to keyboard information at $C000 via the 6502's bus to capture any key press data. It uses this information to allow the user to navigate and select disk images. Once an image is selected, Carte Blanche makes that image available to the slot it is currently residing in before enabling its VGA mode, producing an image on the LCD screen of what is currently in the Apples II's video memory. To see how this works, connect an external monitor simultaneously to the IIe whilst having an LCD screen connected to Carte Blanche, and you will see how the dual displays work with Carte Blanche using one display, the Apple IIe using the other, but both responding to the same keyboard data. Just this one example allows us to realise what we could do with several Carte Blanches, each reading a different block of video memory.
At power up, on the odd occasion the screen will display the classic Apple II scrambled text image. If you see this image, simply Control-OpenApple-Reset, before a Ctrl-Reset to return full keyboard control to Carte Blanche.
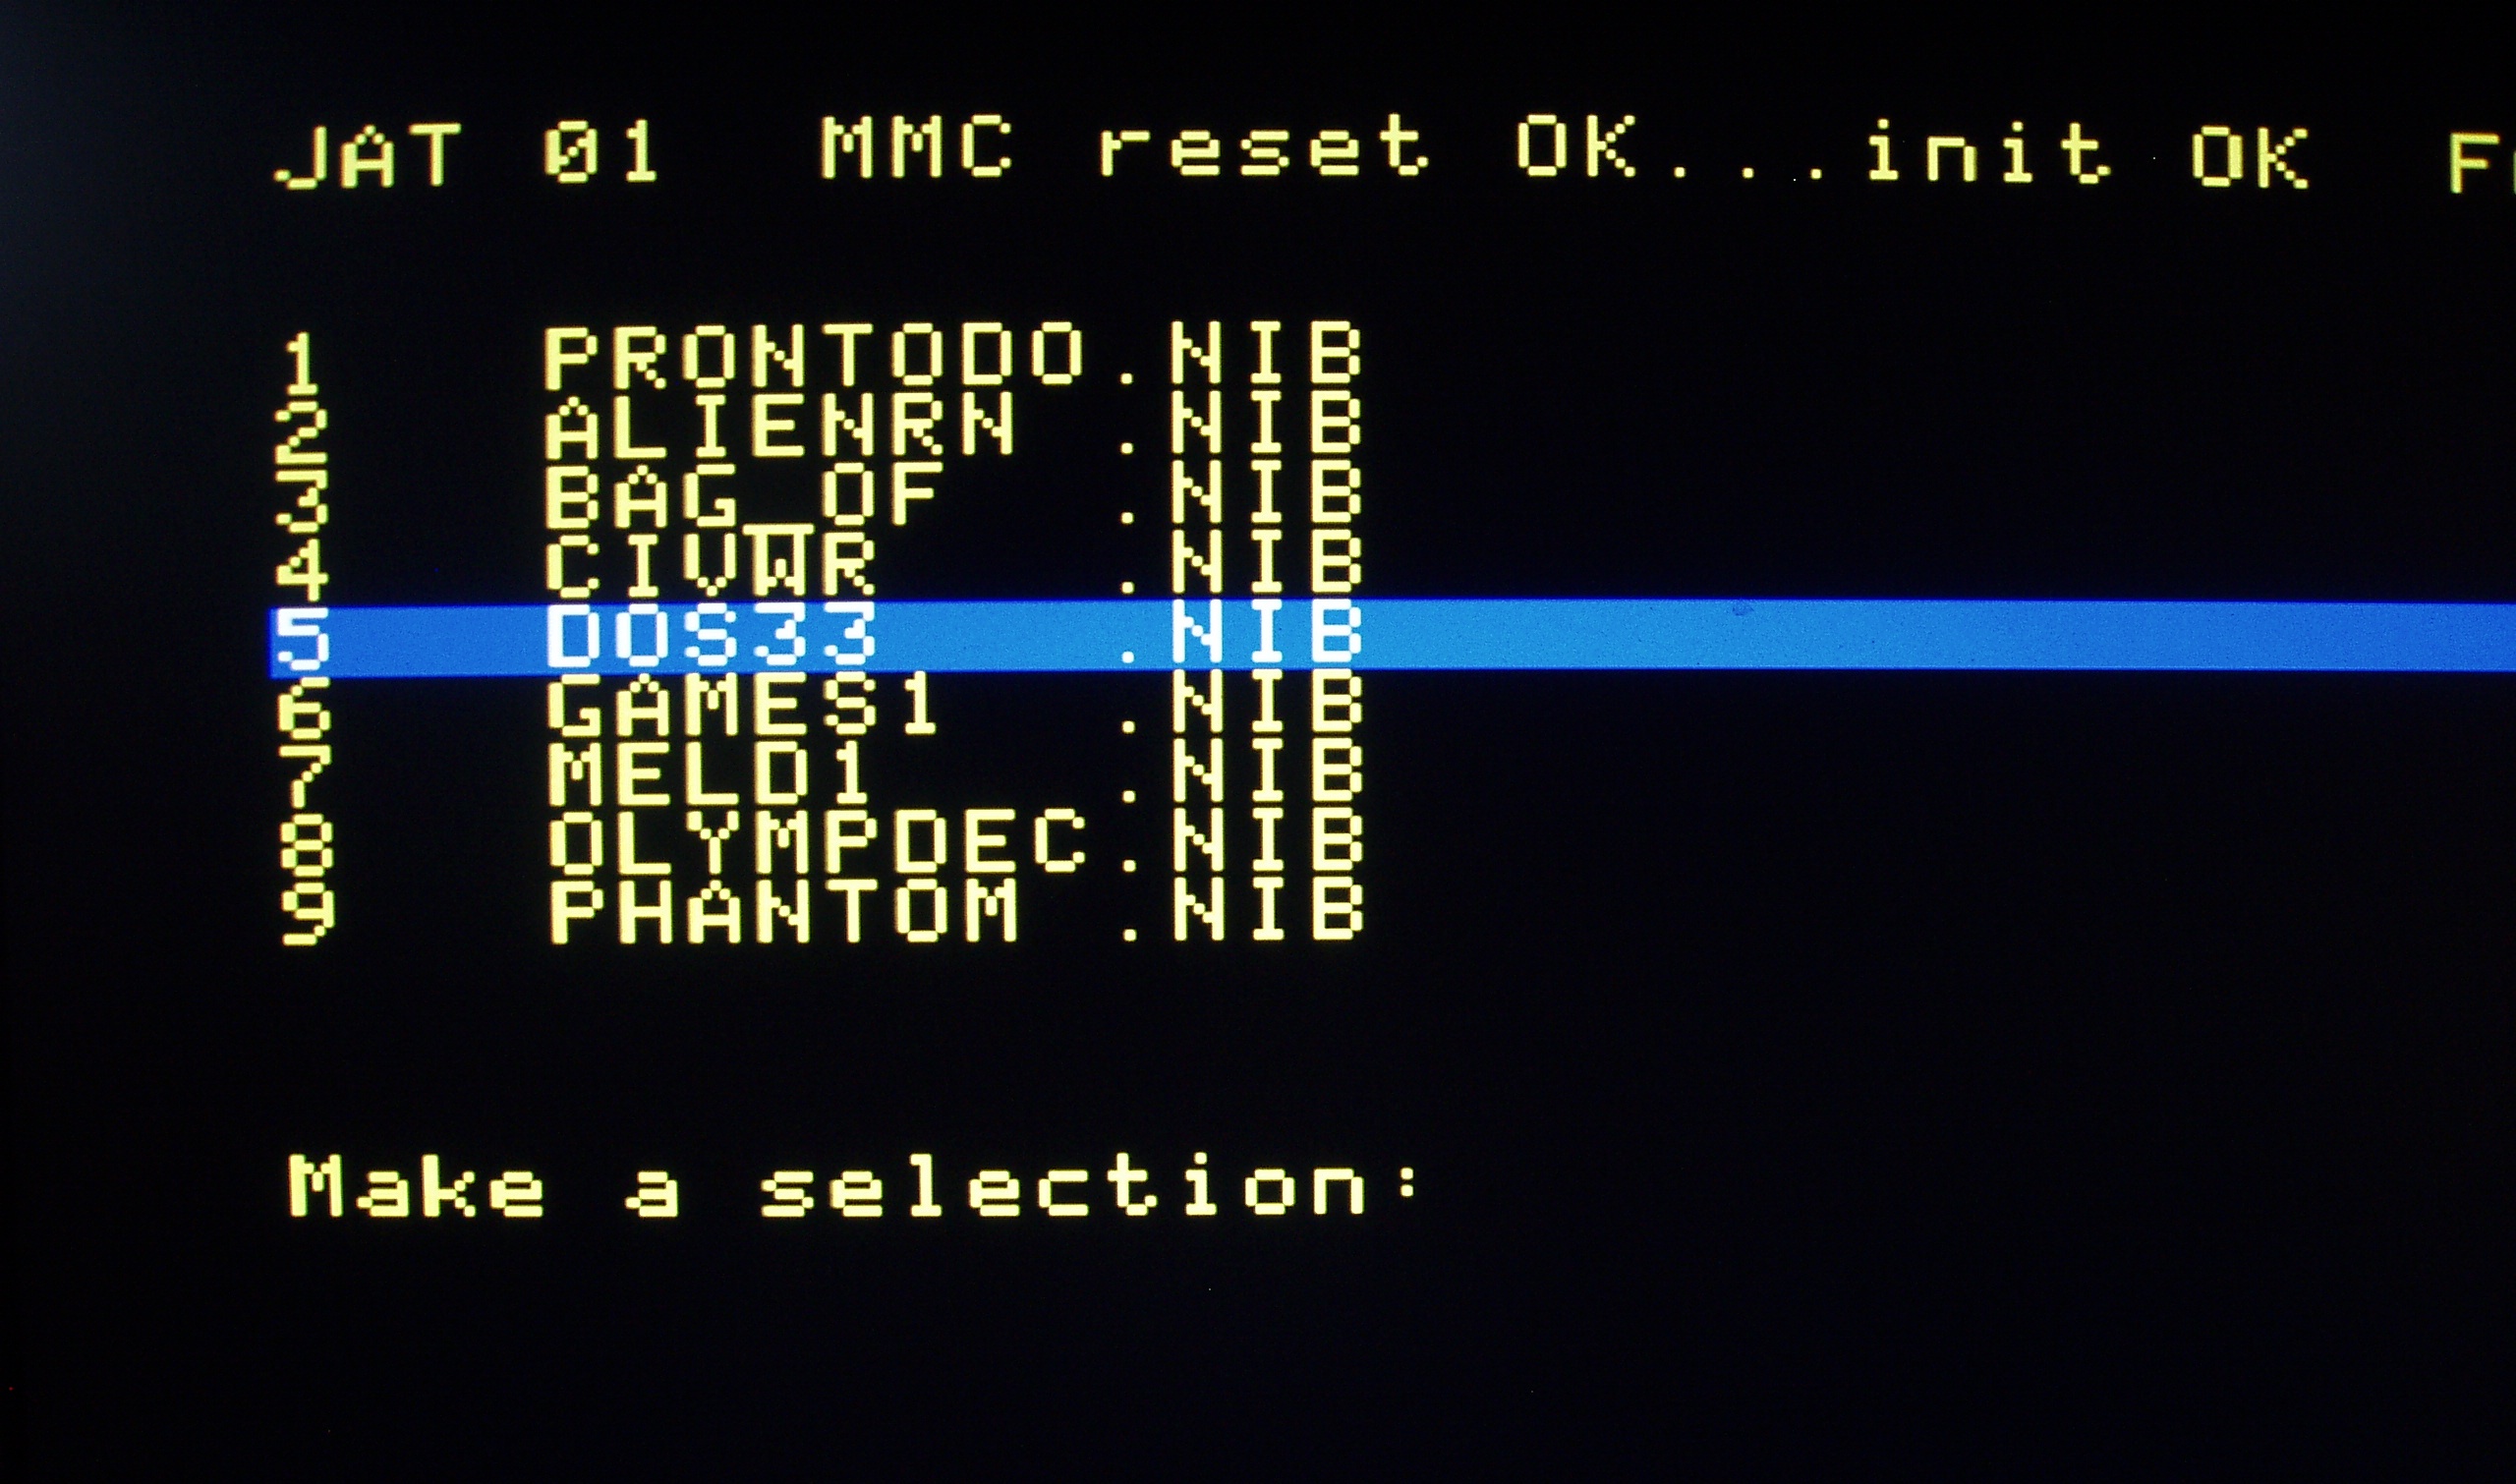
With the JAT menu on the screen, and the "Democard" SD card installed in your Carte Blanche board you should see the catalog page on JAT. Use the <-- and --> keys to navigate to a disk you wish to boot from. In this example, lets choose one of the most popular boot disks in the history of computing, the Apple II DOS 3.3 disk:
JAT is one of the many designs Carte Blanche is capable of accommodating inside its 250,000 or 500,000 gate FPGA. To experiment with different hardware, and to obtain a feel for how Carte Blanche is able to morph into various other designs, you need to obtain a JTAG download cable, such as Xilinx's DLC9/DLC10 or Altium's DT01/02. Other cables are also available. If the concept of a JTAG download cable is a little new to you, a research session on Google will help provide a better feel for what these things are all about. FPGA's can receive design information in several different ways. The two most popular methods are via an external non volatile memory at power up (such as Carte Blanche's SPI Flash memory, also referred to as "Platform memory"). The other is a more dynamic method, where the design information (usually in the form of a .BIT, or bitstream) is downloaded directly into the FPGA via JTAG, overwriting the current design inside the FPGA, but preserving the contents of the external flash/platform memory. This method is excellent for development, as well as for assessment, or loading different designs on the fly. By downloading the examples on our website, such as the Alarm clock, or any of the diagnostics designs, you can download to your Carte Blanche to simply experiment and see how these designs work, and what they do without the fear of overwriting your JAT design in the Carte Blanche flash memory.
Data on Xilinx's JTAG USB Cables can be found here:
DS300 - DLC9 Platform Cable USB Datasheet and Specification
DS593 - DLC10 Platform Cable USB II Datasheet and Specification
UG344 - USB Cable Installation Guide
Carte Blanche set up and installed in an Apple IIe. Things to note: the red stripe of the ribbon cable, as this indicates pin 1. The two pins at the top of the SVGA connector on Carte Blanche are intentionally missing. The Cable connects to the SVGA IO Board from the bottom.
JAT Version 1 - Carte Blanche's Example Application. Using the left and right arrow keys, the user is able to select a disk image of choice. On hitting return, typing PR#4, and pressing return once again, the selected image will boot the system.
1. Navigate to DOS33 using the
Left (<--) and Right ( -->) arrow keys. Press <RETURN>
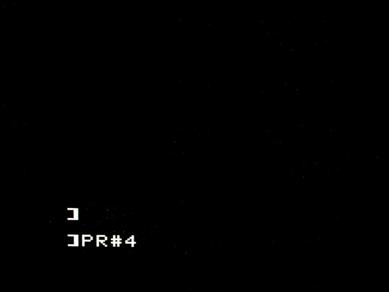
2. The .NIB DOS3.3 disk image has now been installed in your Carte Blanche Drive. To boot the image as though it were a floppy disk, type;
PR#4 <RETURN>
There are many other examples on the supplied SD Demo card. Take a moment to experiment with the selection and boot process to get a feel for how the design behaves and how long it typically takes for disk images to load on your system. If you ever lose control of the disk image or JAT application, simply Control-OpenApple-Reset to return to the JAT menu, and a consecutive Control-Reset to give keyboard control to JAT.
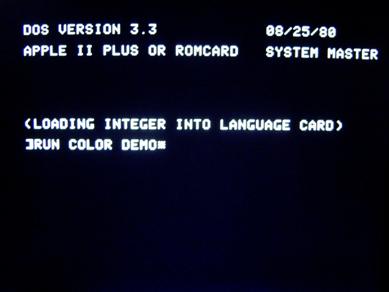
The system goes through the familiar booting process.
Typing CATALOG <RETURN>, to bring up the usual suspects.
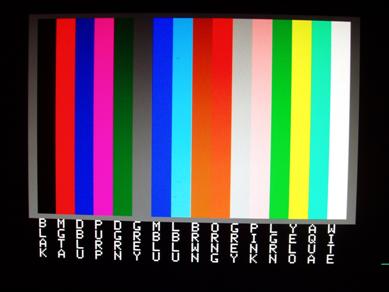
Type RUN COLOR DEMOSOFT <RETURN>
to see how Carte Blanche's Video colors look on your SVGA screen.


